


When it comes to installing eavestrough, precision and proper technique are key factors for success. Starting with the initial measurements and layout planning sets the groundwork for a smooth installation process. But what about the critical step of ensuring a seamless connection between sections? You’ll want to pay close attention to this aspect to prevent potential leaks and water damage in the long run. Stay tuned to discover the essential tips and tricks for achieving a flawless eavestrough installation that will safeguard your home effectively.
Tools and Materials Needed
To begin installing eavestrough, gather the essential tools and materials needed for the job. Safety precautions are crucial; make sure you have gloves, safety glasses, and a sturdy ladder. For proper installation, you’ll need a hacksaw, drill, gutter sealant, brackets, downspouts, and of course, the eavestrough itself.
When choosing between seamless vs. sectional eavestroughs, consider that seamless eavestroughs have fewer joints, reducing the chances of leaks and clogs. Sectional eavestroughs are easier to install but may require more maintenance over time. Whichever type you choose, ensure it fits the dimensions of your roof correctly for a seamless and effective installation process.
Now that you have all the necessary tools and materials, you’re ready to move on to measuring and planning.
Measuring and Planning
Gather a measuring tape and begin evaluating the length and incline of your roof to accurately plan the placement of the eavestrough system. Understanding the gutter slope is vital for proper water flow towards the downspouts.
Consider the gutter size based on the amount of rainfall in your area to guarantee effective drainage. Proper planning is key to preventing water damage and providing weather protection for your home.
Make note of any obstacles like chimneys or vents that may impact the gutter layout. Make sure the eavestrough system extends slightly past the roof edge to direct water away from your home’s foundation.
Installing Downspouts
Consider the best positioning of downspouts along your eavestrough system to efficiently channel water away from your home’s foundation and prevent potential water damage.
When installing downspouts, prioritize both water drainage and the aesthetics versus functionality balance. Make sure that downspouts are strategically placed to direct water flow away from the house, preventing pooling near the foundation.
Opt for downspouts that complement the overall look of your home while effectively managing water runoff. Secure the downspouts firmly to the wall to guarantee stability during heavy rainfall.
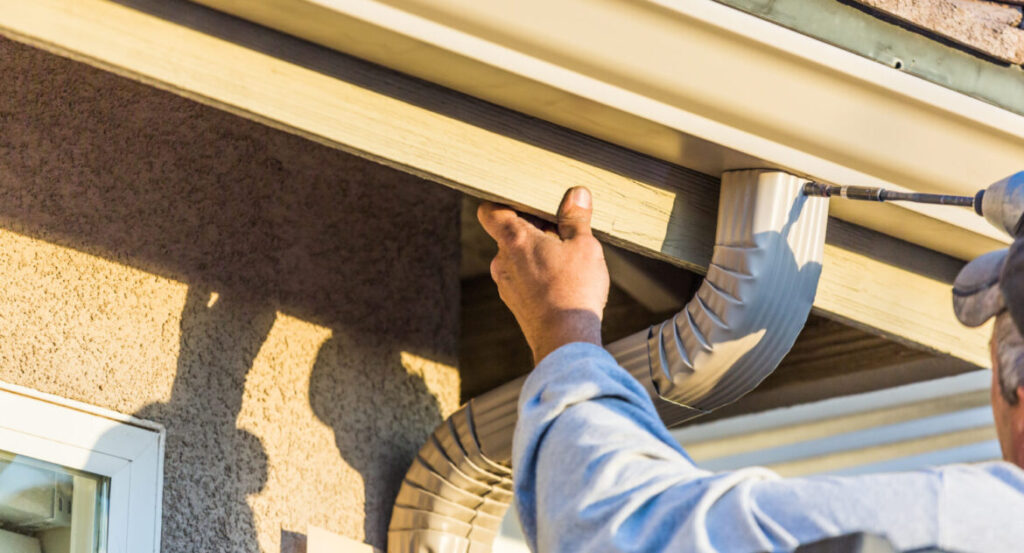
Securing Eavestrough to Fascia
When fastening the eavestrough to the fascia, establish a strong and dependable attachment to prevent any potential damage or issues with water drainage. Proper alignment is essential to guarantee the eavestrough functions effectively.
Begin by positioning the eavestrough parallel to the roofline, maintaining a slight downward slope towards the downspout for proper water flow. Use durable screws or brackets to secure the eavestrough firmly to the fascia board, ensuring it can withstand varying weather conditions.
Maintenance Tips
To maintain the efficiency and longevity of your eavestrough system, regularly inspect and clean out debris from the gutters and downspouts. Use a strong ladder to access the gutters and wear gloves to protect your hands from sharp objects.
Begin by removing large debris by hand and then flush out the remaining dirt and smaller particles using a garden hose. Check for any leaks, loose fasteners, or signs of wear and tear while cleaning.
Implement preventative measures such as installing gutter guards to minimize debris buildup and reduce the frequency of cleanings. Consider scheduling a thorough cleaning at least twice a year, ideally in the spring and fall, to ensure peak performance of your eavestrough system.
Conclusion
To sum up, by following the step-by-step guide for installing eavestroughs, you can guarantee proper water drainage and protection for your home.
Are you ready to take on this DIY project and enhance the functionality and aesthetics of your property?
Remember, with the right tools, materials, and maintenance, your eavestrough system will continue to operate efficiently for years to come.
Need help? I would recommend contacting https://grizzlybrothersgutters.com today.